
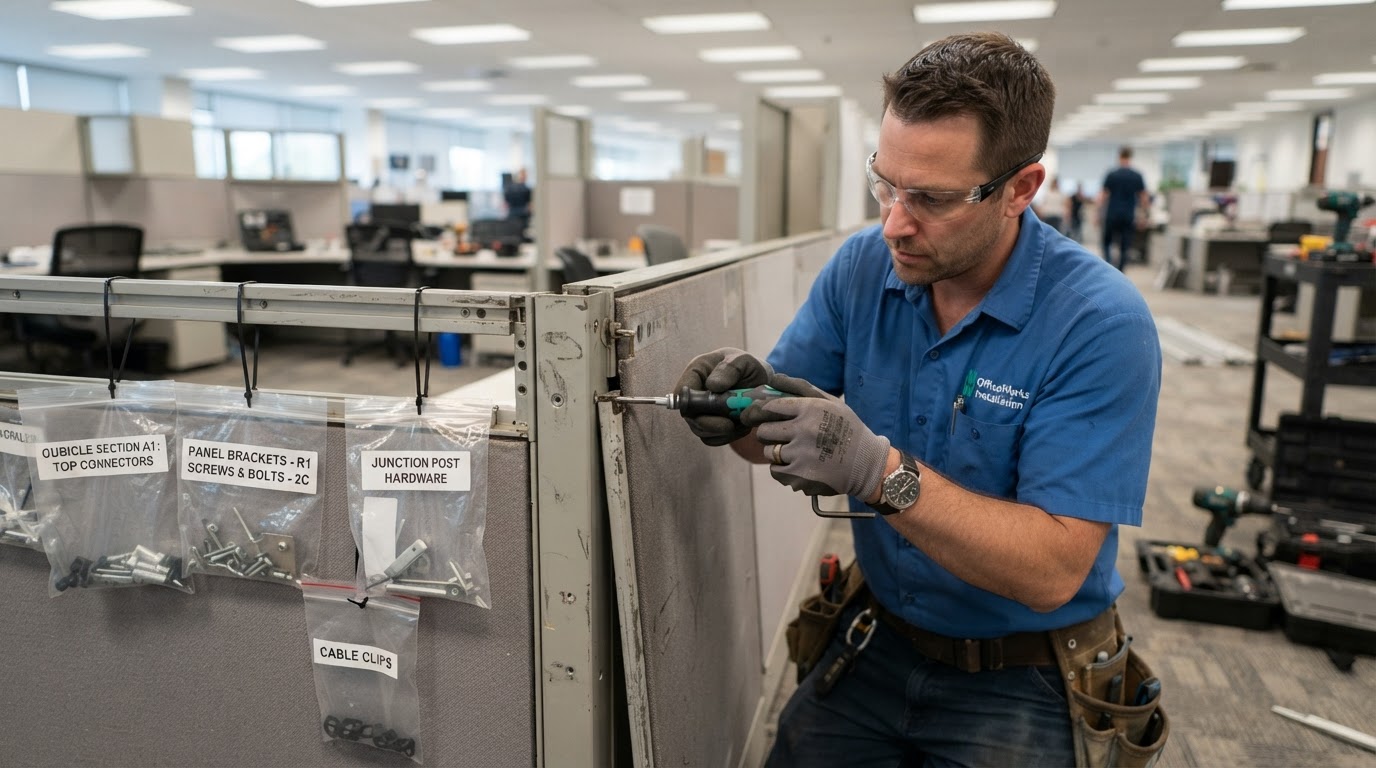

Modular office furniture is a substantial capital investment, and office furniture disassembly and reassembly is the single phase of a move where shortcuts become the most expensive mistakes. A panel transported without its hardware bag is a panel that cannot be reassembled. A raceway disconnected by cutting the whip rather than unbolting it is a raceway that must be re-pulled and re-terminated. The protocol for office furniture disassembly and reassembly exists because every shortcut in the disassembly phase becomes a cost in the reassembly phase — and on a weekend move, those costs are measured in hours of downtime.
This guide walks through the disassembly and reassembly protocol that professional installers follow to protect the furniture investment and ensure the new floor is functional by Monday morning.
Step 1: Pre-Disassembly Documentation
Before any panel is separated, the installation crew photographs each workstation from multiple angles. The photographs document the panel configuration, the raceway routing, and the cable management layout. These photographs are the reference for the reassembly — when the crew is rebuilding workstation 42 at the destination, they consult the photo to confirm the panel order, the raceway path, and the cable routing. Office furniture disassembly and reassembly begins with documentation, not with a drill.
Step 2: Raceway Disconnection by a Qualified Technician
Cubicle power is governed by UL-listed raceway systems — typically 4-wire or 8-wire — that must be disconnected by a qualified low-voltage technician. The technician kills the circuit at the panel, tests dead, and disconnects the whip at the floor monument. Live raceways are never cut. Cutting a raceway whip means re-terminating the connection at the destination — a service call that costs more than the entire disassembly if it was done correctly in the first place.
Step 3: Panel Separation in Reverse-Assembly Order
Panels are separated in the reverse order of their original assembly. A two-person team lifts each panel off its connector and stages it vertically on a panel cart. Laying panels flat warps the frames over the course of a move — a warped frame will not seat correctly at the destination, and the entire workstation will be out of alignment. The panel cart is the single most important piece of equipment in the disassembly phase; a crew without it is a crew that will lay panels on the floor.
Step 4: Hardware Bagging and Labeling
Every screw, cam lock, connector pin, and power harness is bagged in a labeled zip bag and taped to the panel it belongs to. The bag label carries the workstation ID, the panel position within that workstation, and — on projects using digital inventory — a QR code. This is the single biggest difference between a professional installer and a general laborer: the laborer throws hardware in a coffee can; the installer returns every piece to its exact home. Office furniture disassembly and reassembly fails most often not in the lifting but in the hardware — a missing cam lock on workstation 42 means a loose panel at the destination.
Step 5: Transport in Dedicated Equipment
Panels travel vertically on panel carts in a dedicated furniture truck — never mixed with general cargo, never stacked flat. The truck is padded with quilted blankets and load bars to prevent shifting. The raceway harnesses travel in labeled bags, and the hardware bags travel taped to their panels. Every piece of the workstation travels as a unit so it reassembles as a unit.
Step 6: Reassembly Against the Chalk Line
At the destination, the crew snaps a chalk line from the CAD floor plan and sets the first panel against it. Each subsequent panel is leveled with a torpedo before its connector is torqued. The hardware bags are opened in assembly order, and every screw and cam lock returns to its home. The raceway is recommissioned by the same technician who disconnected it: the whip is reconnected at the floor monument, each outlet is tested, and the circuit is labeled. The result is a floor of cubicles that sits flush against the wall, plumb to the floor, and wired to code.
Step 7: Quality Verification
The crew lead walks the floor and verifies each workstation: panels plumb, hardware torqued, power tested, desk calibrated, cable management in place. A signed verification sticker on each desk confirms the workstation is ready. Any issue not caught here becomes a Monday-morning ticket — and the goal of the entire protocol is a floor with zero Monday-morning tickets.
Office furniture disassembly and reassembly is a protocol, not a task. The crew that documents, bags, labels, transports, and reassembles to the manufacturer's specification is the crew that returns the furniture investment intact — and the crew that skips those steps is the crew whose first shortcut becomes your most expensive line item.
Find Furniture Disassembly & Reassembly Providers
Certified technicians for precision breakdown, hardware tagging, and reassembly of executive workstations and desks.